When I moved to Denmark, I knew I’d eventually have to face the process of exchanging my Philippine driver’s license for a Danish one. I’d heard mixed stories — some people said it was easy, others said it was a headache. I’ll walk you through what happened to me, including all the little things nobody tells you, so you’re prepared for both the smooth parts and the “why is it like this?” moments.
I just gave birth to my third child, and here I am pushing through my review because I can’t accept any more excuses. I’ve been in Denmark for three years and still haven’t gotten around to it. So it’s now or never. If you still haven’t gotten your license by now, that’s on you. Period. If it’s a priority, you will find the time.
Step 1 – Go to Your Local Kommune
Your first stop is your local kommune (municipality). I know from friends that different communes sometimes have slightly different rules, so it’s always best to ask yours directly.
In my case, the requirements were:
- Filled-out application form
- Doctor’s clearance
- Original Philippine license
- Passport
- Migght as well rbing your opholdstilladelse and other relevant IDs
Once you submit everything, the kommune will give you a stamped/verified paper saying you have two years (I think!) to get your Danish license.
If Your License is Expired
If your license is expired, like mine was, here’s the difference:
You won’t get a temporary Danish driving license (a piece of paper that allows you to drive while your application is processed). Instead, you have to pass both the Danish theory test and practical driving test before you can drive legally.
If you pass both, you get your actual license. If you don’t, well… you wait until you pass.
Step 2 – Pass the Theory Test
The first step is passing the theory test. You don’t actually need to enroll in a school for this — you can just self-review. I apid a subscription from prove.dk. It’s definitely not the best but there’s not much choices out there.
I met some Filipino friends who paid for theory lessons, and we all agreed it was a waste of time. You’re better off getting a subscription to an online theory practice site. If you can answer almost all questions correctly there, you’re ready. Don’t take this lightly or you’ll spend more time and money for the retakes. Aim for max 3 mistakes before you book your test.
In the exam, if you make more than the 5 allowed mistakes, you fail.
There are 25 questions — but here’s the catch: I call them “items” because each one actually has 4 sub-questions. If you answer even one incorrectly, the entire item is wrong. I know, I know… I’ve been there!
And the worst part? Some questions just don’t make sense. They’ll trick your brain, and they’re obviously translated literally from Danish, so some of them are worded in a way that feels off. Even my Danish husband agrees! But keep reviewing — it will grow on you.
The good thing is you can choose to have the review materials in English (which I did) and also choose to take the exam in either Danish or English. Phew!
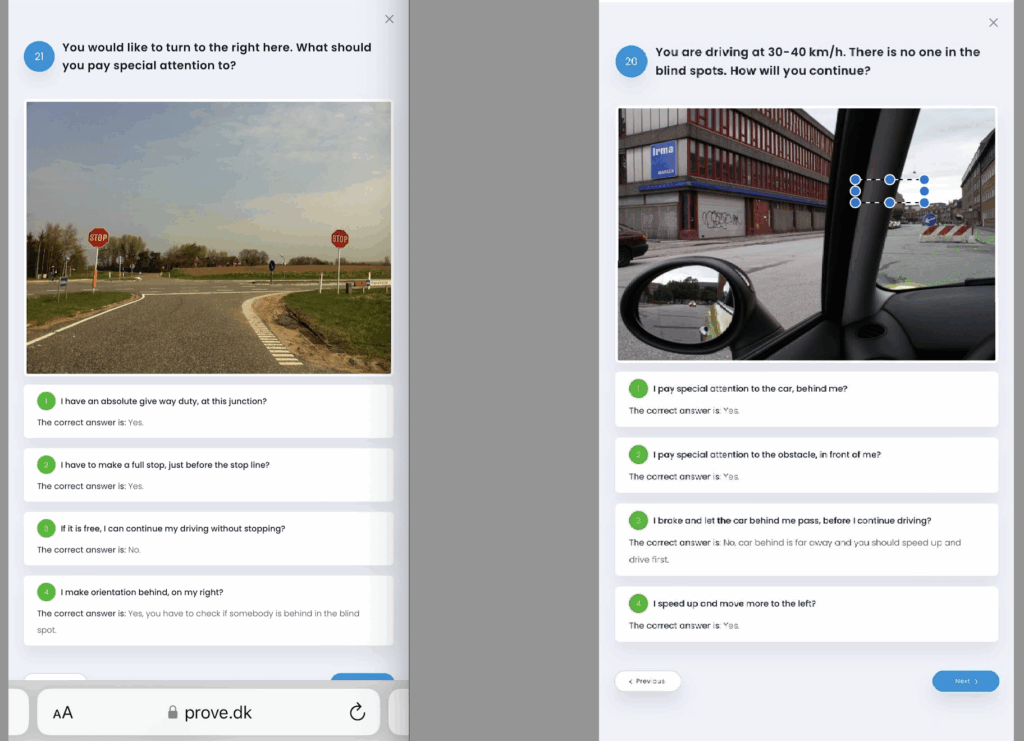
Here’s an example of how a question is formatted.
What Happens at the Testing Center
I had mine in Aalborg. Arrive early to calm your nerves and gather your thoughts.
You and the other test-takers will be led to a room.
READ: Bring your ID and the form from your kommune. Without these, you will NOT be allowed to take the exam.
They’ll check your identity and give a short orientation. The screen in front of you will show the same format you’ve been reviewing (not the exact questions, but very similar). You write your answers on the sheet provided.
When you’re done, you hand your paper back to the examiner and wait outside. A few minutes later, they’ll call you one by one to give your result. Good luck!
Keep that paper if you pass — you’ll need to hand it to your driving instructor for the next step.
Step 3 – Pass the Practical Test
You’ll need to find a driving school that will let you “rent” their car for the exam. If you need an automatic car like I did, your options will be limited. If you can do manual, you’ll have plenty of choices.
You pay per session (around 45 minutes). Since this is about exchanging your PH license, I assume you already know how to drive. Your instructor will decide when you’re ready for the practical test based on your first lesson — they’ll assess how skilled and confident you are, and how well you know Danish traffic laws.
I hadn’t driven for 10 years, so for me, it was almost like starting from scratch. I took several lessons, but if you’re an active driver, you might be fine with just 3–5 sessions.
On the Day of Your Practical Test
Your instructor might give you a 30-minute refresher to warm you up. Then they’ll drive you to the testing station, park the car, and leave you to be “eaten by the lions” (that’s how it felt!).
A few minutes later, the police officer in uniform comes out. He sits next to you, does some paperwork, checks your ID, and asks 3 oral technical questions. If you answer these correctly, you start the 20-minute drive, taking different routes and traffic situations.
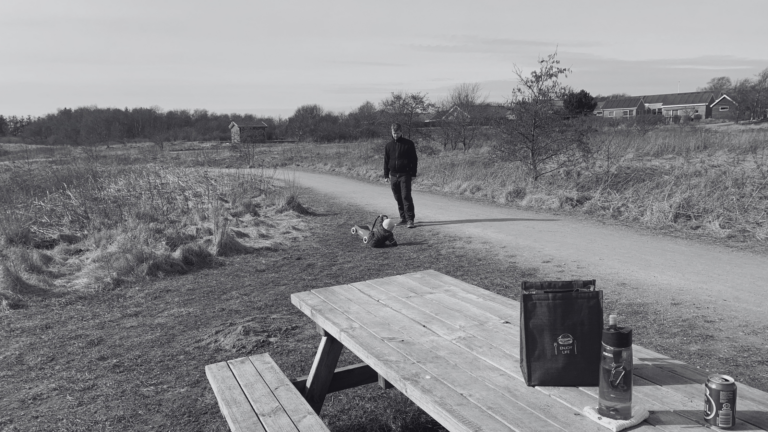
Make sure to check your mirrors — in Danish they call it spejl, spejl, skulder (mirror, mirror, shoulder). Don’t rush in the round abouts or making a turn (I got this as a comment), and just silently breath in and out to focus. No matter how ready you are, you can make really stupid mistakes by simply being too nervous.
If You Fail
I failed my first test. I was upset — even though I knew I deserved it.
Why I failed: I was so nervous that I took a turn coming out from a side road without looking to my left — where there was an oncoming car. The police examiner had to brake for me. Instant fail.
But don’t overthink it. It’s over and move on. Here’s How:
- Allow yourself to be sad. Reward yourself with a good meal — you earned it for the effort.
- Go online to book and pay (about a thousand DKK) for your retest (yes, ouch!).
- Inform your instructor so they can find you the next available slot.
- Schedule extra lessons — maybe one is enough, maybe more, depending on you and your instructor.
Waiting time can be anywhere from one week to a couple of months. Sometimes, if you’re lucky (or your instructor likes you — just my theory!), they might find you an earlier slot. Use this waiting period for refresher lessons.
Extra Tip for Filipinos
If you’re vacationing in the Philippines and haven’t driven for a while, practice there — it’s much cheaper. That way, in Denmark you only need to focus on learning the traffic laws and the exam format.
For new drivers, it can still be cheaper to take lessons in the Philippines, get a license from the LTO, and then convert it to a Danish license, instead of starting as a completely new student in Denmark. That can cost around DKK 15,000!
If You Pass
Your examiner will tell you right after you park and finish the test. If you pass, you get a temporary license immediately, allowing you to drive right then and there. Your actual license will arrive in your mailbox in a few weeks.
Exchanging your PH license for a Danish one can be a bit of a process, especially if it’s expired. But with some patience, review, and practice, it’s totally doable — and trust me, the moment you hold that Danish license in your hand feels so good.
BEST OF LUCK! Kaya mo yan, sis!